After we successfully added a website in Virtualmin, we should add an SSL certificate so our users would be able to access our website without any errors in their browser.
The following article will walk us through the easy process.
1. Select your website in Virtualmin
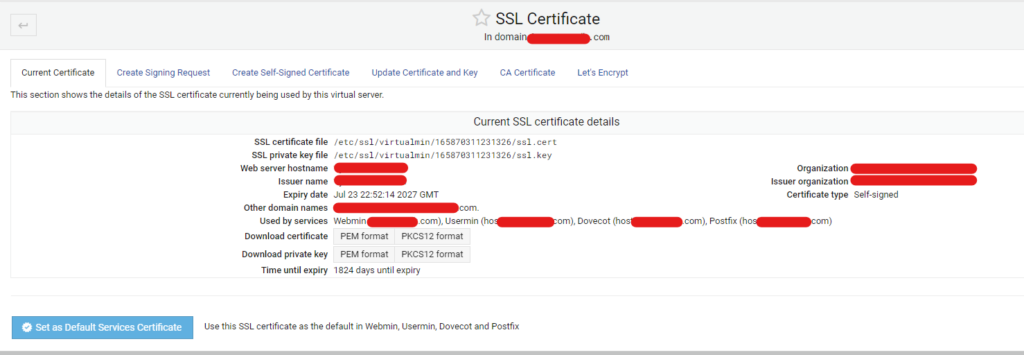
Navigate to Virtualmin tab, select your website -> Server Configuration -> SSL Certificate as on the screenshot below.

Now, we can see our current SSL certificate along with the information about the issuer and all the necessary details.
2. Install Lets’ Encrypt Cert
Under the SSL Certificate navigate to the Let’s Encrypt tab and click the Request Certificate button.
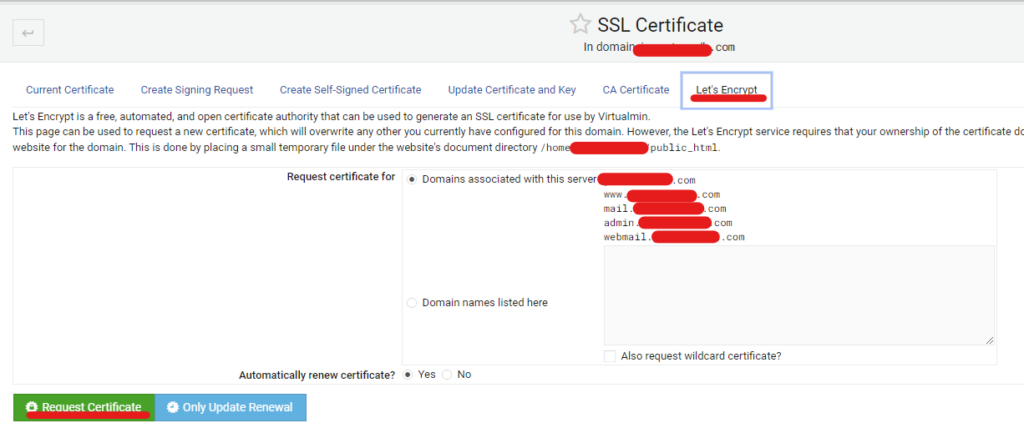

So, as we can see from the screenshot’s log, the request was successful and Virtualmin has set up the SSL for us and restarted itself automatically.
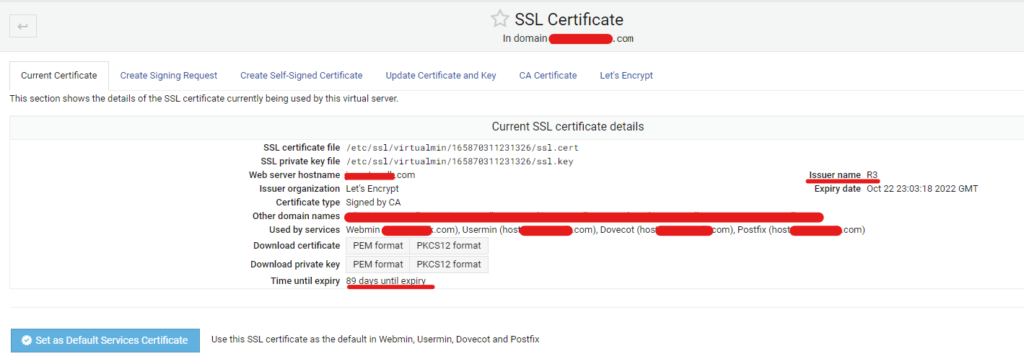
If we go back to the SSL Configuration page, we would be able to see a new certificate and the expiry date along with the other details.
3. Extra step – Force SSL Website
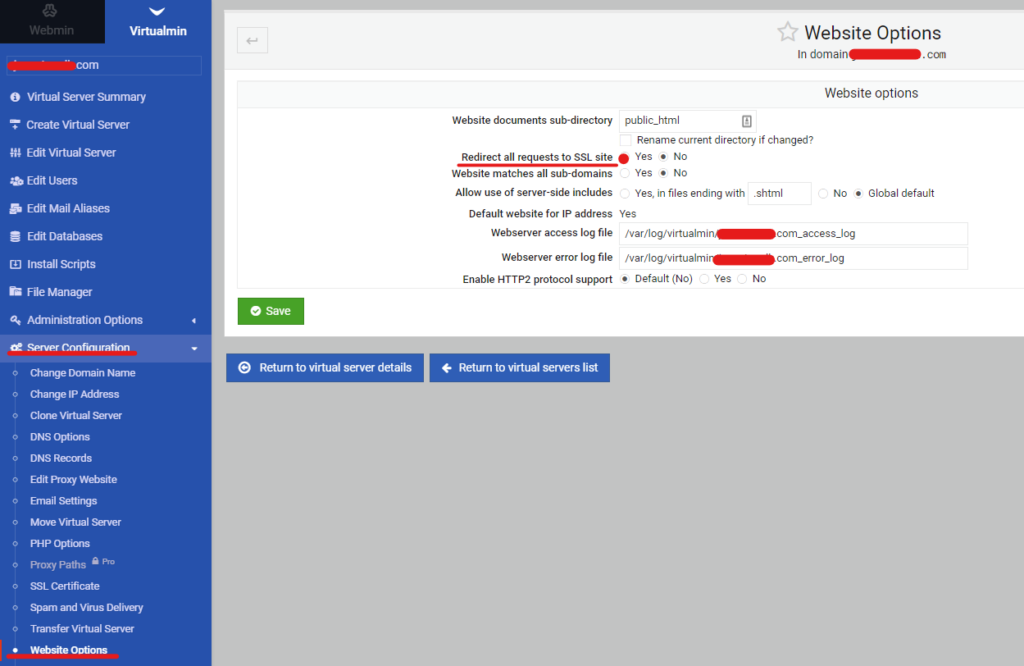
Under Virtualmin -> Server Configuration -> Website Options Select option Redirect all requests to SSL site – yes and hit Save.
Now all requests on your website will go through SSL.


![Angular 21: Why Native [class] is 2x Faster than ngClass!](https://blog.adnanhalilovic.com/wp-content/uploads/2026/01/why_native_class_is_2x_faster_than_ngclass_youtube_thumbnail-360x180.webp)




![Angular 21: Why Native [class] is 2x Faster than ngClass!](https://blog.adnanhalilovic.com/wp-content/uploads/2026/01/why_native_class_is_2x_faster_than_ngclass_youtube_thumbnail-120x86.webp)


