If you may have experienced issues with AWStats after installing Virtualmin on your server, or if you uninstalled it from Virtualmin, you should review this post to learn how to restore it.
1. Uninstall (Skip this step if you are not reinstalling)
If you are willing to reinstall the broken version of AWStats from your Webmin follow this step.
Navigate to Webmin -> Webmin Configuration -> Webmin Modules -> Delete tab as on the screenshot below.
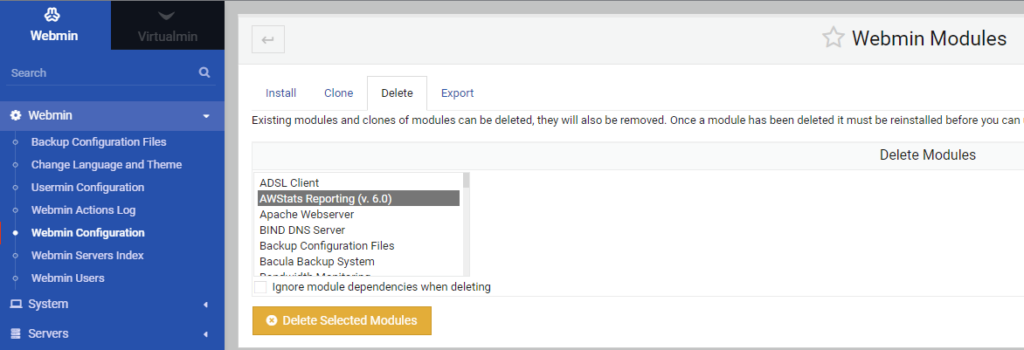
Select AWStats Reporting and click Delete Selected Modules.
Then you will get the following prompt message, where you should click Delete

If the process was successful, the confirmation message will be displayed.

So this is the step where we are removing AWStats from Virtualmin.
2. Install AWStats Module
Navigate to Webmin ->System -> Software Packages as on the screenshot below.
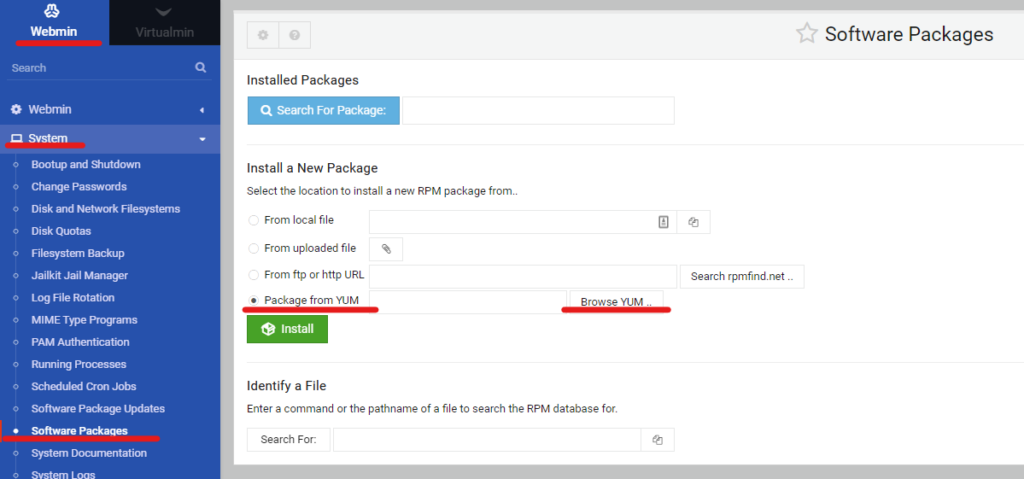
Here we have to check ‘Package from YUM’ and Browse YUM...
After you click on the ‘Browse YUM…’, a new modal will appear.
Type AWStats, select ‘wbm-virtualmin-awstats’ from the list, as on the screenshot below.

After this step, click on the Install Module button.
If the installation was successful, the following confirmation message will show up.

3. Enable AWStats Plugin
After we successfully installed the AWStats reporting plugin, now we have to enable it to be able to use AWStats.
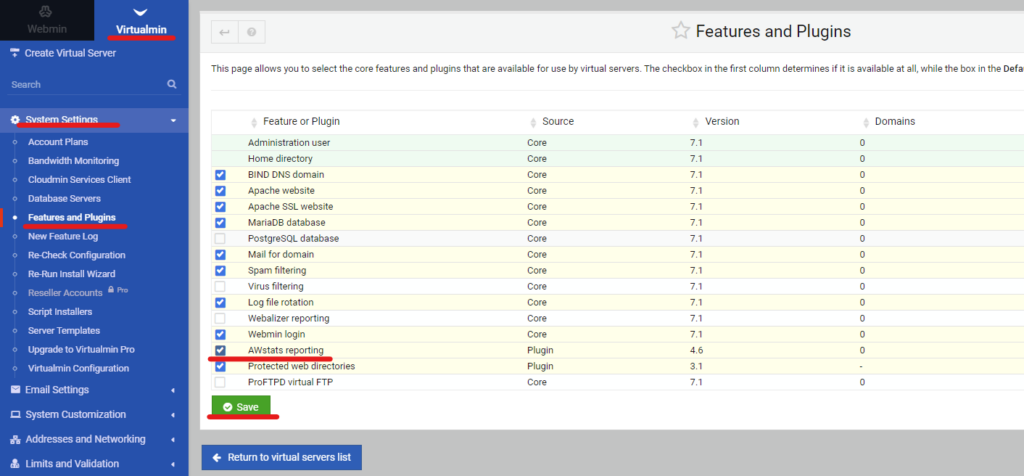
Navigate to Virtualmin -> System Settings -> Features and Plugins, and check the AWstats reporting plugin, then click on the Save button.
Extra step (If you were unable to enable AWstats plugin)
If you couldn’t save ‘Features and plugins’ changes to AWstats reporting modules, you should do an extra step.
Click on the AWstats reporting to open the config screen, as on the screenshot.

What has to be fixed here?
If we take a look at the path where our AWstats plugin was installed, we will see that our configuration is actually misconfigured.

So, we have to change the paths on the AWstats Configuration page.


