WordPress appears to be a viable option for establishing portfolio websites, news portals, and even online stores nowadays.
If your website or a client’s website is managed using the Virtualmin control panel, the process will be as rapid as feasible.
In this post, we will quickly establish a WordPress website and database by following three simple steps.
1. Navigate to Virtualmin
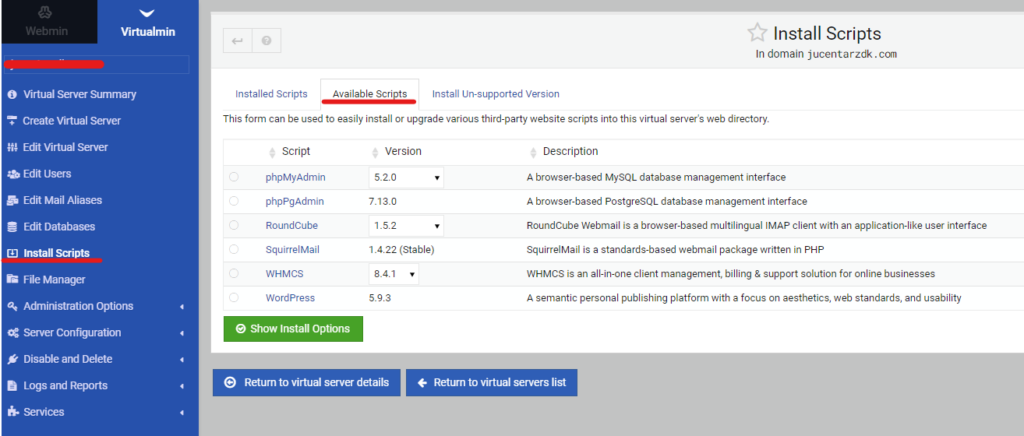
Navigate to Virtualmin, select your website and click on the Install Scripts, then select Available Scripts tab, as on the screenshot below.

On this screen, select WordPress and click on the Show Install Options.
2. Fill in the WordPress information
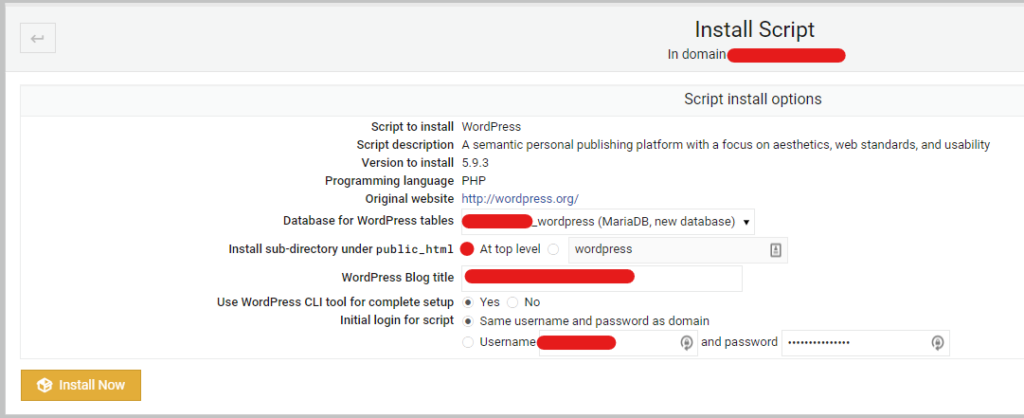
After we click the ‘Show Install Options’ button, a new screen appears. Fill the data in the necessary fields, as on the screenshot. (I have hidden some personal info).

A note here. After you fill in all the necessary information, make sure to select ‘At top level’ in the Install sub-directory under public_html, which means that our WordPress website will be available on the root of our domain’s public folder, instead having it in the WordPress folder. (But, if you really want to have it like this yourdomain.something/wordpress or any other folder name go on with it).
Click Install and wait for it to complete the setup for us.

3. Login
After the installer finished with the installation. We can navigate to our website and use the login data provided by the installer. (See the screenshot above).
Navigate to yourwebsite.something/wp-admin where you will see the well-known WordPress login page.

Conclusion
We were able to see how easy it is to run a WordPress website using Virtualmin’s install scripts, without thinking about databases, users and the WordPress install wizard.
If you haven’t set up an SSL certificate on your website in Virtualmin, you should follow the following article to check how to do it easily.
Thank you for reading the article.


![Angular 21: Why Native [class] is 2x Faster than ngClass!](https://blog.adnanhalilovic.com/wp-content/uploads/2026/01/why_native_class_is_2x_faster_than_ngclass_youtube_thumbnail-360x180.webp)


![Angular 21: Why Native [class] is 2x Faster than ngClass!](https://blog.adnanhalilovic.com/wp-content/uploads/2026/01/why_native_class_is_2x_faster_than_ngclass_youtube_thumbnail-120x86.webp)


