Adding a new website to Virtualmin is an easy process, as Virtualmin allows us to create more than one virtual server (website/hosting) on our VPS machine.
1. Log in to Virtualmin

After you logged into your Webmin, click on the Virtualmin tab then click on the ‘Create Virtual Server’ link, or if you don’t have any virtual servers, you can also see a button ‘Add new virtual server, owned by:’.
Be sure that the website you are creating is pointing to your server, and that on the server you set up the DNS, otherwise you won’t be able to configure SSL Apache Website.
2. Enter the server information
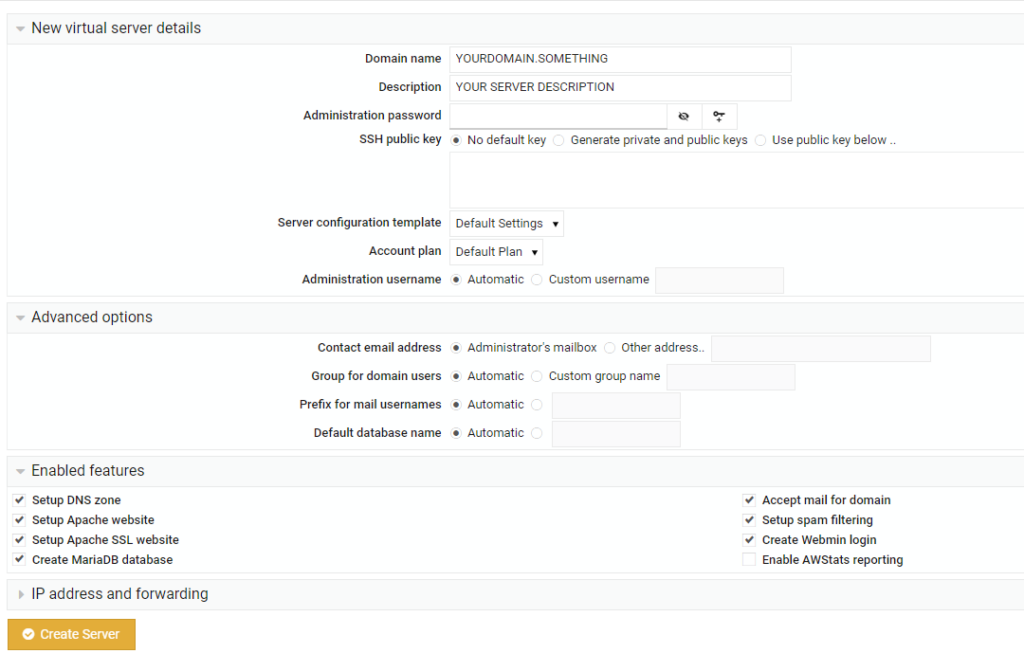
After we clicked on the ‘Create Virtual Server’ the following screen appeared.

Fill in the data as per the screenshot above. Also, if you would like (why don’t you?) to have an SSL website, also check the ‘Setup Apache SSL website’ under the ‘Enabled features’ dropdown, as it is not checked by default.
Click on the Create Server button. During the process of installation, the installer will set up all the necessary configs for us, such as creating a new user group, setting up an SSL website, and everything needed to have our website up and running.
3. The result
After the process completes, we can see our Virtual server with all the information we entered in the previous step.


![Angular 21: Why Native [class] is 2x Faster than ngClass!](https://blog.adnanhalilovic.com/wp-content/uploads/2026/01/why_native_class_is_2x_faster_than_ngclass_youtube_thumbnail-360x180.webp)


![Angular 21: Why Native [class] is 2x Faster than ngClass!](https://blog.adnanhalilovic.com/wp-content/uploads/2026/01/why_native_class_is_2x_faster_than_ngclass_youtube_thumbnail-120x86.webp)


